WordPress Security Guide Overview
If you are a website owner and particularly if you have a business that relies on a functional website, you should have a good understanding of the potential issues related to malware and other hacker related system problems. In this post we’ll discuss everything you need to know to avoid hacks and how to recover from them if you are hacked. To that end, I’ve broken this guide down into several different sections. I’ll outline the different sections of this post below:
First, this guide is focused on WordPress websites as WordPress is the most popular web development CMS today. IF you are using a different CMS, some of these principles will apply but obviously not the WordPress plugins that we discuss.
Anyway, I’m hoping you are reading this article before your site has been hacked. If that is the case, the first section will outline the steps and procedures you should have in place -right now- to keep your site running even if the “bad guys” are knocking at your door. This first section will provide real, actionable information that you can start using today, to protect your site. Included in this section is a discussion on backing up your site and the tools and in some cases, the specific settings you should use to protect and monitor your WordPress site. I do recommend several specific hacker related plugins that I use and will provide you with the specifics on how I use them and what each tool provides. The good news is the tools I will be discussing offer very robust free versions but have paid solutions that provide additional features. I’ll discuss both the Free and Paid versions of the plugins to allow you to decide if upgrading is worthwhile in your specific case.
In the second section we’ll discuss the various types of hacks there are and how the hackers are able to access your system. I’ll also try to explain what kinds of things the hackers are trying to do once they get in. We’ll look at the various issues that happen to WordPress itself but we’ll also see that many times WordPress simply provides the point of entry for the hacker. Once in, the hacker may be using their newly acquired site access to do things outside of WordPress that reek havoc with your website, your hosting account and your reputation with the search engines.
The third section will cover what to do when you find out you’ve been hacked. We’ll discuss how to use the tools described in the first section to recover your site. We’ll also go through how to secure your site and what to look for in WordPress and your cPanel to get rid of the things the hacker may have installed in your hosting space. We’ll also describe how to recover your search listings if the search engines have marked your site as “Dangerous”. My hope is you won’t need this third section, that you will have applied the tools discussed in the first section to prevent the hacks before the start.
Protecting yourself from hackers and malware
WordPress Backup And Restore
Years ago when I was starting out as a web developer, one of my mentors would say “You’re only as good as your last backup”. In the years since I’ve seen that phrase proven a few times. No matter what happens on your site or your server, if you have a good backup you can at the very least recover something. If you don’t have a “good” backup, you may be starting from scratch. There is more to backing up then just installing a WP backup plugin and clicking “Backup”, in this section we’ll go through the full process so you can create a comprehensive backup strategy for your own site.
What to backup?
It’s easy to install a backup plugin like “All in one Migration” or Updraft and set it to run and in many situations this will be fine. However, these plugins typically only backup the WordPress ecosystem. If your site has been comprised by a hacker they may get in through WordPress but they may actually be installing malicious code in non-Wordpress parts of your server. In this case, your WP backup plugin won’t do anything to correct the hack, it will simply allow you to restore your WordPress installation, leaving the malicious files that were uploaded outside of WordPress, in place.
I do recommend using both a WP backup plugin but I also recommend making full backups via your hosting cPanel. In this way, you’ll have easy to restore WordPress backups that can be utilized if you have a non-hack related WordPress issue on your site. If your site has been hacked and has to be restored, it’s recommended to first restore the full cPanel backup, this will overwrite any malicious code that was placed there in the non-Wordpress areas. Once the full backup has been restored, you can then restore the most-recent pre-hack volume of the WordPress backup.
Frequency of backups
Another consideration is the frequency of which you backup and how many backup volumes you should retain. This is a decision you should make based on your own site. If you run a site where you make infrequent posts, then maybe backing up once per week is all you’ll need to do. If on the other hand you have a busy ecommerce website that is getting new orders every day, then you should consider making daily or even hourly backups. It’s a question of how much data can you afford to lose, because if you have to restore from a backup, you will most likely lose some data.
As I discussed above, I recommend using both a WordPress backup plugin and a making hosting cPanel backups. The post-hack recovery plan will include first restoring your cPanel backup, this should give you a “clean” hack-free environment to then restore your most recent clean WordPress backup. To that end you’ll need to decide how often you should be making both backups.
If you don’t use your cPanel for emails (and today many people opt for 3rd party services like Gmail) and you only run WordPress website(s) on your server then you can probably get away with less frequent cPanel backups as besides WordPress, not much will be changing on a daily or weekly basis. If however you have other non-Wordpress applications running on your server or you do have your emails going through cPanel you will probably want to backup more frequently.
Your WordPress backups should (probably) be made more frequently. Again, how frequent depends on the type of site you are running and the amount of activity it has. It’s not uncommon for busy ecommerce websites to backup hourly.
Related to backup frequency is the number of volumes you should save. You need to consider that you may not notice the hack right away. If this is the case your most recent backups may already contain the corruption. You should always save multiple volumes of both types of backups as an added insurance.
So how many volumes should you save? Once again, this is a decision based on how your site is used and how much data you are willing to lose. If you run only WordPress on your server and you use Gmail for all of your emails then saving five monthly cpanel backup volumes is probably enough. If your WordPress site is updated two or three time per week then it may make sense to backup daily but to save the last ten WordPress backup volumes. Remember, in the worst case scenario, you’ll first restore the cPanel backup, then overlay the last good WordPress on top of that.
One last consideration is where to store your backups. It’s great to store everything on your server but if the whole server crashes, your well thought out backup plan will prove useless if none of your stored backup volumes are able to be recovered. Storing your backups off-server is a great idea. I have been using Amazon S3 for very inexpensive data storage for quite a few years now. Most backup plugins/systems all you save your backups to S3 or other services like it.
Keeping Current – Site Updates, your first line of defence
Besides having an organized backup schedule in place, keeping your WordPress site updated to the latest and greatest versions is key. As we’ll see in the next section where we discuss Firewalls, WordPress and all of it’s plugins and themes can be subject security vulnerabilities. Conscientious developers take these matters very seriously and create updates as soon as they come to light. These updates are rolled out in the form of updates that in many cases need to be installed manually.
The rule here is simple, make sure to install all updates as soon as they are released.
Claim your site with Google Search Console
This should be a necessary step for any site for a number of reasons, not the least of which is site security. Once your site has been claimed (and you are required to upload an HTML file to prove you have access to the site), you will have a direct means of communication with Google for security issues. Google will note any issues it finds in the control panel. You an also use this section to notify Google that your site has been cleaned and you would like to have it reevaluated. Having this in place before any hack will save you time once a hacker strikes.
Malware Scanners and Firewalls
There are plenty of software tools that can help you protect your site. In this post I’m going to focus on the two plugins that I use. There may be others that may be just as good as these but my purpose here is not to make an extensive list of these applications, my purpose is to show you how to start protecting your site today, in the most efficient manner. The two plugins we’ll discuss here are Wordfence and Sucuri. Here’s an explanation of each.
Wordfence – malware scans and Firewall protection
I install Wordfence on every website that I own or manage and for most sites, I only use the Free version of this plugin. With Wordfence, I can run malware scans as often as I want. The scanner has multiple options that allow me to run “Standard” scans or more sensitive scans. The more Sensitive scans are more thorough but can return false positives. Any returned issues are displayed in a list with a recommended action. In most cases you can let Wordfence correct the issue in the way it recommends. Scans can be scheduled to run periodically, either when you want them to run or you can opt to let Wordfence decide the best schedule for your particular site.
Two Factor Authentication For additional Login Security
Another great feature and it’s also available in the free version of the plugin is Two Factor Authentication for your login. What this does is add another step to the login process. You first enter your Username and Password, as long as those are both correct you will be taken to another screen that is requesting a numeric code. To get this code you need to use a third party app (I use Google Authenticator), it’s an app on my Iphone, when I launch it, it generates a random numeric code that I need to input into this login screen. As long as you enter the correct code, you are taken to the WP dashboard as normal. While this is admittedly a more cumbersome process, it provides a much more secure way to get in, as even if a hacker has been able to crack your Username and password, they will still have to crack this new (constantly changing) code before they can get in.
Wordfence Firewall (WAF)
The other thing I use Wordfence for is the Firewall (WAF). What is a Firewall? A firewall is just what it sounds like. It’s an added layer of security between your website and the rest of the world. The Wordfence Firewall, looks at every attempt to access your website and tries to determine whether the visitor is trying to gain unauthorized access to your site. Even the free version of the plugin provides excellent Firewall coverage. The Firewall has rules written to block all known attacks. The Wordfence developers work diligently everyday to find new vulnerabilities in WordPress and in Plugins and Themes and create the new Firewall rules that will block them. New rules are rolled out immediately to premium (Paid) users, and after thirty days to the free users.
A note about the Free Version of Wordfence Firewall:
While the free users don’t get the new rules immediately, it is the policy of Wordfence to NOT publicize the issues they find. When a new issue is found (they call these Zero Day Vulnerabilities), Wordfence first contacts the developer of the app and attempts to work with them to correct the breach. Most of the time this is an effective solution and the developer corrects the issue and rolls out a patch for their users. So, while the Free users don’t have the firewall protection at first, as long as they are keeping their websites updated, this solution will probably work for them.
Again there are many settings in the Firewall that allow you to control how your site responds. My main focus is in the “Brute Force Protection”. Brute force hacks are the most common, they are typically bots that scour the web looking for WordPress websites to exploit. When they find one they attempt to crack the admin username and password by trying multiple different combinations. Among the WAF settings are settings that will block a user after a predefined number of failed attempts, the plugin can also be set to immediately block any user that enters an invalid username.
Wordfence Dashboard – Online access for multiple site management
This last feature of Wordfence is great if you manage multiple sites. Once again, this is available in the Free version of Wordfence. With dashboard, you register each site that you manage and you can view issues and run scans from one central location. You won’t have to log into multiple sites to check scan results or run new scan, you can do all of that from the dashboard:
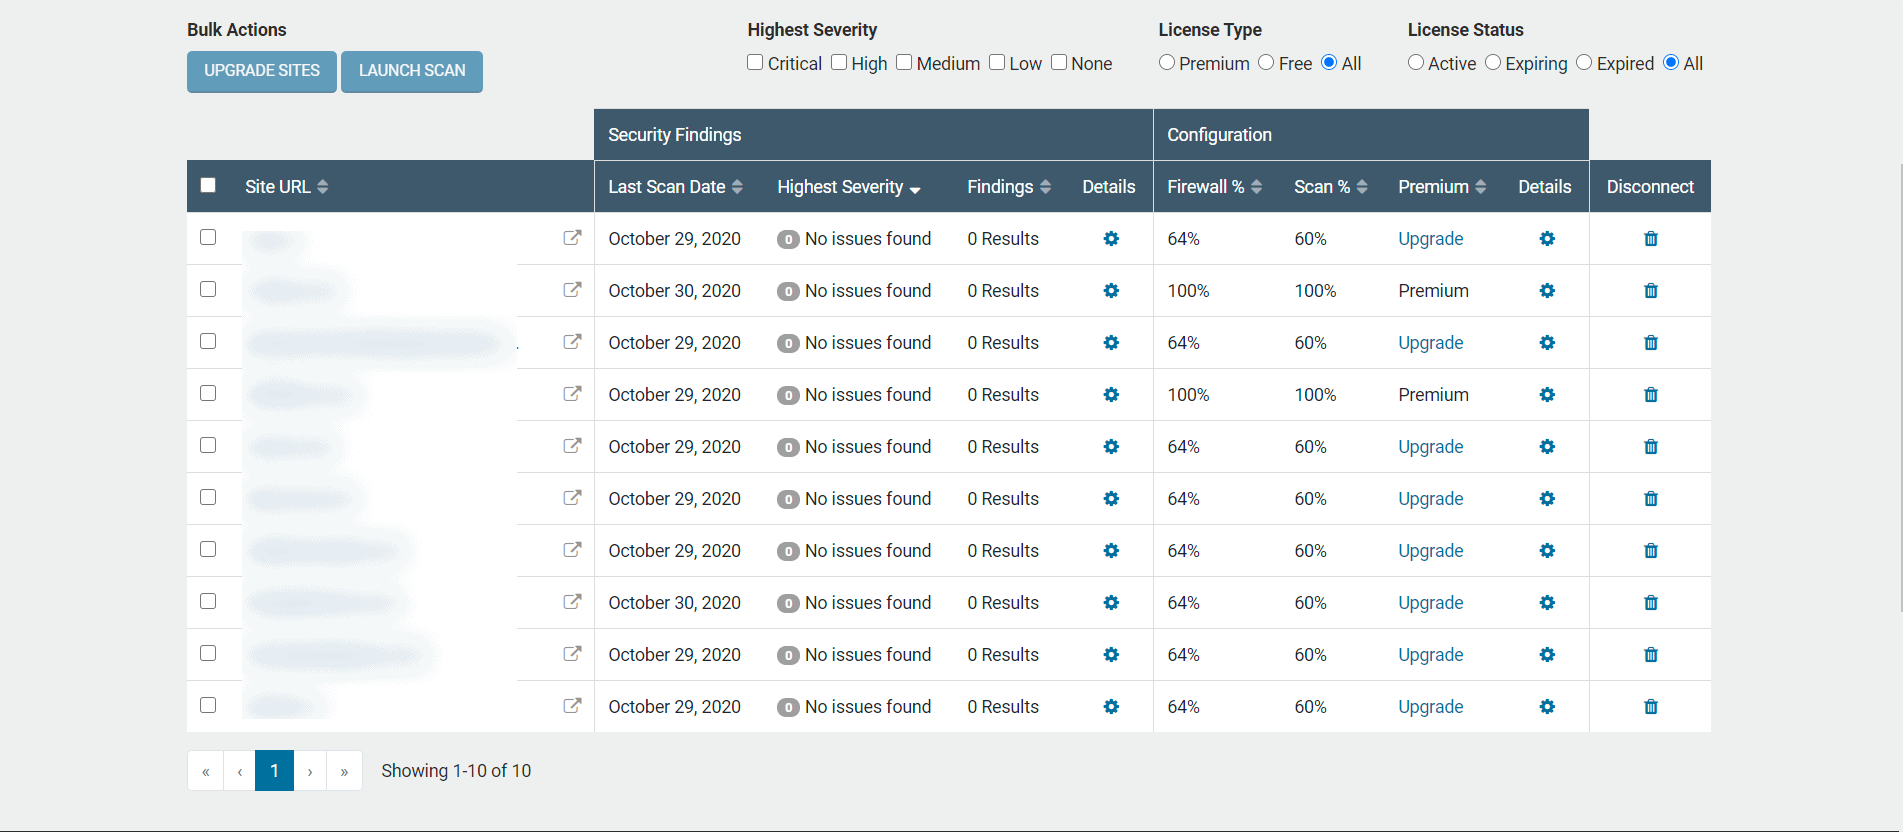
I keep my Wordfence Dashboard opened in a browser window all day and glance at it periodically throughout the day to see if Wordfence has found any issues.
Sucuri Security – WordPress Hardening
WordPress hardening is (as it’s name implies), the process of making your website harder to crack or break into. For this, I use the Sucuri Security plugin. There are quite a few manual ways to do this but Sucuri has a number of settings that will help to make this process much easier. Sucuri also has a malware scanner and Firewall (like Wordfence) but I don’t use their version of these, I rely on Sucuri for it’s hardening capabilities.
When I’m installing a new site, I install Sucuri and navigate to the “Hardening” and “Post Hack” sections. I’ve attached a screenshot of the Hardening settings for you to see:
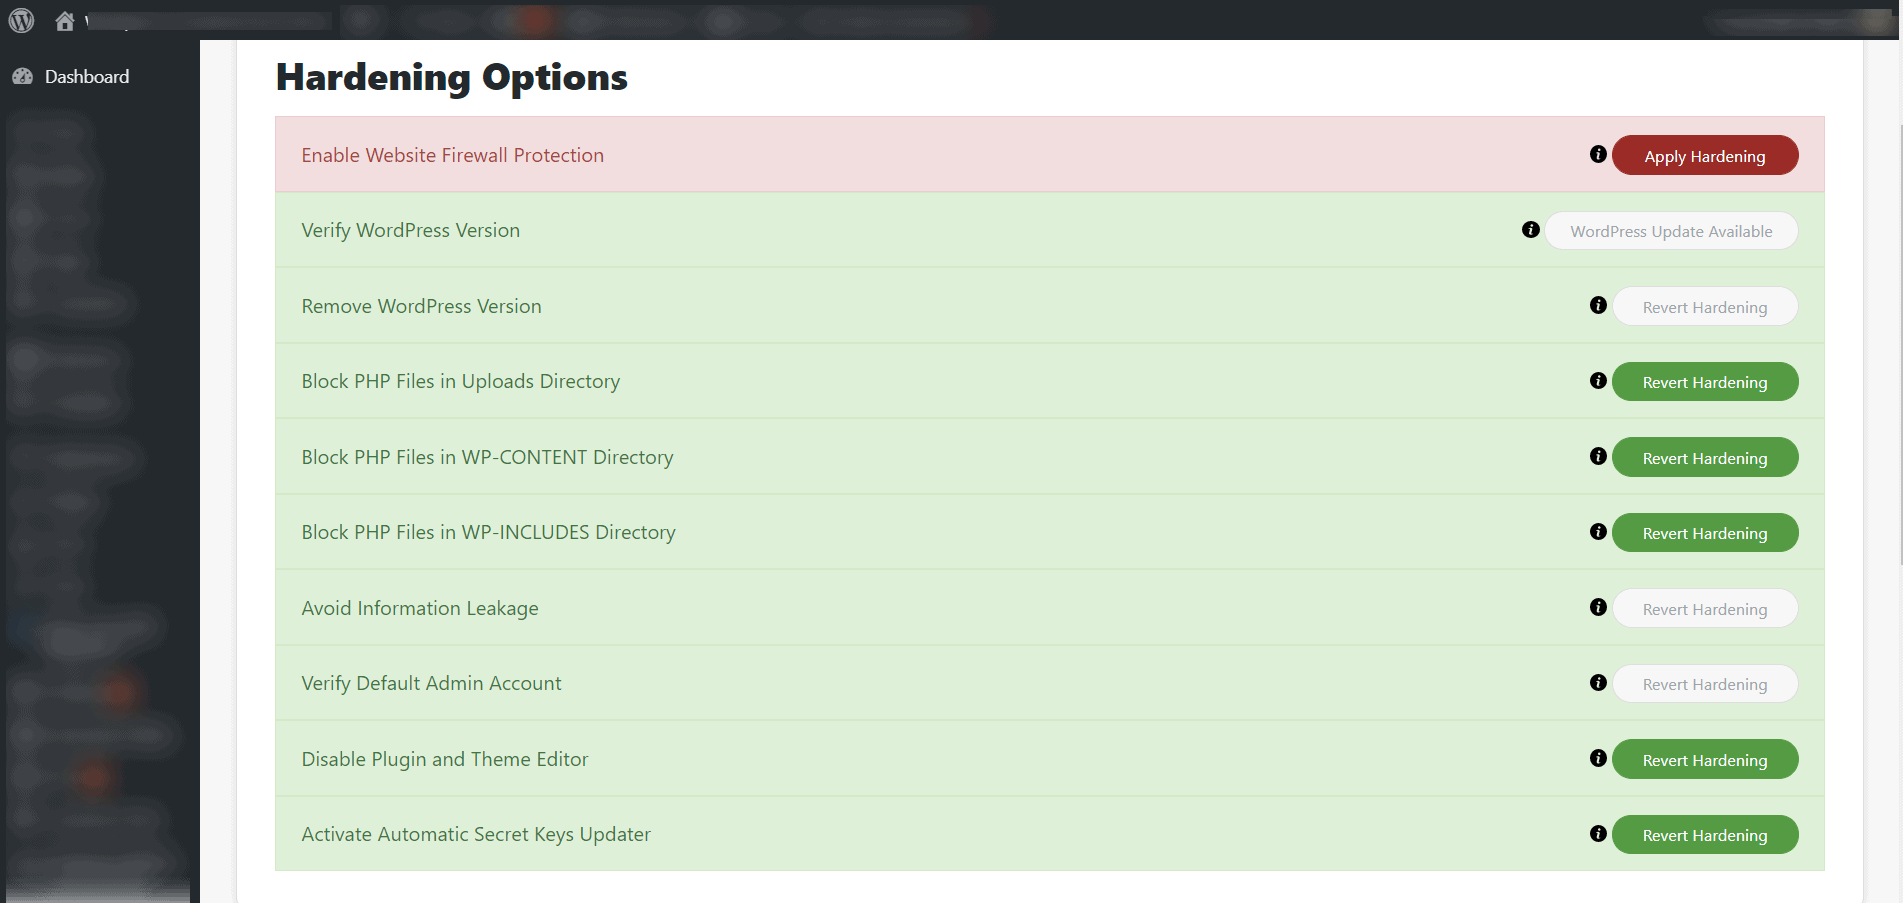
I essentially turn on all available options except the Firewall (with Sucuri, the Firewall is only available to paid members). Most of the remaining options are part of the Free version. I invoke all of them.
The other section that I configure are the “Post Hack” options. This section relies on the WordPress Salt Keys. The Salt keys are contained in your wp-config file (See image below), they are cryptic looking strings of characters (numbers, letters and special characters) they are randomly generated when your site is installed. When a user logs in, these Salt keys are used to encrypt your passwords and cookies. As long as the Salt keys haven’t changed, you can remain logged into the site (unless there is some other timed log out plugin activated). If however, the Salt keys are updated, all logged in users are automatically logged out and have to log back in to access the site.
Most website owners never update their Salt keys, under normal circumstances that’s probably fine. However, once you’ve been hacked, if those Salt keys remain the same, the hacker may still be able to access your site even after the hack has been found. The Sucuri “Post Hack” options allow for these Salt keys to be changed both manually (immediately after a hack) and automatically at different time intervals. I set the sites I manage to automatically change the Salt keys daily. That means, if a user doesn’t use the “Log out” option, they will be forced out within 24 hours.

What kind of hacks are there and how do hackers get into my site in the first place?
Firstly, hackers are looking for vulnerable sites 24 hours a day, 7 days a week. However, the hackers what we need to be most concerned with are not sitting in front of their computers, randomly trying to “crack” your password – those types of “hands-on” hackers do exist but typically they’re going after huge sites, government installations etc. They’re not bothering with smaller sites or blogs.
The hackers we need to be concerned with are using “bots” or “spiders” to scour the web, trying to find sites to break into. These hackers often use something called “Brute Force Attacks” , what this means is they are attempting to “crack” your login by trying hundreds of even thousands of Username/Password combinations.
Once a hacker has gained entrance to your site, they will often install malicious code on your site. (again, they’re not physically doing this themselves, their bots take care of this). This code may redirect visitors to another site or may attempt to trick visitors into giving out credit card information. They may even use their access to install software directly on your web host – out side of the WordPress ecosystem.
While this may sound like a lot of trouble to go through, remember, these hackers are using bots that are doing all of this 24 hours a day. At any time, their bots may be attempting to break into hundreds or even thousands of sites. Cracking through on just a fraction of their attempts can really reek havoc and prove profitable.
It’s my goal with this guide to help you stay a step or two ahead of these idiots.
What to do when you find your site has been hacked?
If you have followed the steps above and already have the anti-hacker tools installed and configured, you’ve claimed your site with Google Search Console and you have a comprehensive backup system in place, then cleaning up your site will be quite a bit easier. If however, you don’t have any of these things in place then it will be more difficult but probably not impossible to get your site cleaned. In this section I will cover both scenarios.
First, regardless of whether or not you have the above mentioned tools in place you should do the following:
- Make sure you can still get logged into WordPress. If you can, verify that there are no new Admin users on your site. If you see an admin user that you’re not sure of, remove it immediately
- Change all existing passwords for WordPress admins and your hosting and FTP passwords.
- Regenerate the WordPress Salts. If you have Sucuri installed, you can do this through the plugin – if not you can get randomly generated salts at this URL: https://api.wordpress.org/secret-key/1.1/salt/. Simply paste that into your Wp-config.php file – over right the existing settings, then save the wp-config.php file. Once you do this you and anyone else that had been logged in will be automatically logged out.
- Make a full backup of your hosting space, do this from your hosting cPanel (you want to do the full backup option here, not just your WordPress installation).
What to do if you can’t get logged into WordPress
Some hacks that I’ve seen actually inject a different username into the database. There is one hack that changes the username to “AnonymousFox”. If that is the case you will need to update the username and password through the database. How to do that is beyond the scope of this post – if you need help with this contact me.
If you don’t already have the Wordfence and Sucuri plugins installed, install and activate them now. Next, go into the Wordfence scan settings, click on “Scan Options and Scheduling” then select the “High Sensitivity” scan type. Now, run the Wordfence scan. While the Wordfence scan is running, you can start configuring Sucuri per the instructions described earlier.
If you had previously installed Wordfence run the “High Sensitivity” scan now. Also, go into the Sucuri “Post Hack” section and click “Generate New Security Keys” then click “Submit”. That will log all users out of the system.
The following steps apply whether you had previously installed the security plugins or if you just did it now:
- Review the Wordfence scan results. There should be a number of line entries in the results section. Some may be marked as “Possibly Malicious”, other may be marked as harmless. You should follow the Wordfence recommendations. Clicking the “Delete All Deleteable Files” should remove the bad files. Next, click “Repair All Repairable Files” that will correct any changed files. At this point your WordPress installation should be clean. However, there may be bad files uploaded to the file system that are not part of WordPress – Wordfence won’t fix these.
- Log into your Hosting Control panel using the new password you created above. You need to see if there were any new email addresses added – if so delete them. Also check to see if there were any new “Users” added -these should be deleted as well.
- While still logged into your hosting cPanel you should run the “Virus Scanner” (most cPanels offer this application). The “Virus Scanner” should be in cPanel under he “Advanced” tab. Click it and select “Scan Entire Home Directory” on the next screen, then click “Scan Now”. The scan will take some time to complete, depending on the amount of data you have on the server. Any infected files it finds, will be listed. Once the scan is complete, select the option to “Clean selected files”. This process will be pretty quick, depending on how many bad file were found.
With any luck, your site will be cleaned at this point and you should be good to go. I always like to run another Wordfence scan here to (hopefully) show a clean site. If Wordfence is finding more “Critical” issues then it may be time to start considering restoring your site from the backups. I wouldn’t throw in the towel just yet though
Restoring From Backup
If after repeated Scans you are still finding new “Critical Errors” it is probably time to consider restoring your backup. If you’ve followed this guide you should have two types of backups: cPanel backups, these are backups of your entire hosting space (not just WordPress but all files contained on your hosting) and secondly you should have WordPress backups – created by a WordPress plugin these backups will include only your full WordPress install.
You should first restore your cpanel backup. If you can pinpoint the day that your hack took place, you should restore the most current backup – prior to that date. Once you’ve restored you cPanel backup – you should log into your WordPress site (at this point it will be an older version because your cpanel backup would include your WordPress website from whatever date it was created), once logged into WordPress you should use your WordPress backup plugin to restore the last known “good” version of the site.
Once all has been restored, you should go back and run the scans as outlined in the previous section to ensure that all aspects of your site and hosting space are clean.
Checking your Search Engine reputation
Once you are confident that your site is cleaned you should take a look at your Google Console and see if Google has detected any security issues on the site. If so you should follow the option to request a new site review. Google is very good at reviewing new requests pretty quickly. If all is “clean” you should hear back from Google with 24 hours (probably sooner).
Final Thoughts
I’m hoping you are reading this guide before your site has been hacked. By implementing the tools and settings I’ve listed you will go a long way toward protecting your site. Unfortunately, nothing is completely safe as there are always “bad guys” lurking around the internet trying to find a way into vulnerable sites and, of course, new vulnerabilities are discovered all the time. Good luck with your site and feel free to contact me if you have any questions or issues.